Hot spots in your coils can turn a smooth vaping experience into a frustrating one. These uneven heat zones not only reduce flavor and vapor quality but also risk damaging your device or wicking material. Whether you’re building your first coil or you’re a seasoned vaper, knowing how to spot and start fixing coil hot spots is essential to getting the most out of your setup.
In this guide, we’ll walk you through what coil hot spots are, how to detect them, and the best techniques for eliminating them—ensuring your coils heat evenly and perform at their best.
What Are Coil Hot Spots?
Hot spots are areas of your vape coil that heat faster than the rest. Instead of an even glow from end to end, these sections overheat, creating potential problems.
Why Hot Spots Occur
There are several reasons hot spots can form:
- Uneven coil wraps
- Improper spacing between coils
- Poor connections between the coil and posts
- Low-quality or oxidized wire
- Physical damage from bending or over-tightening
When any of these factors come into play, the result is uneven resistance, which disrupts consistent heating. Fixing coil hot spots as soon as they’re detected is vital to prolonging coil life and enhancing safety.
How to Identify Hot Spots in Vape Coils
Catching hot spots early prevents bigger issues like dry hits, burnt wicks, or even short circuits.
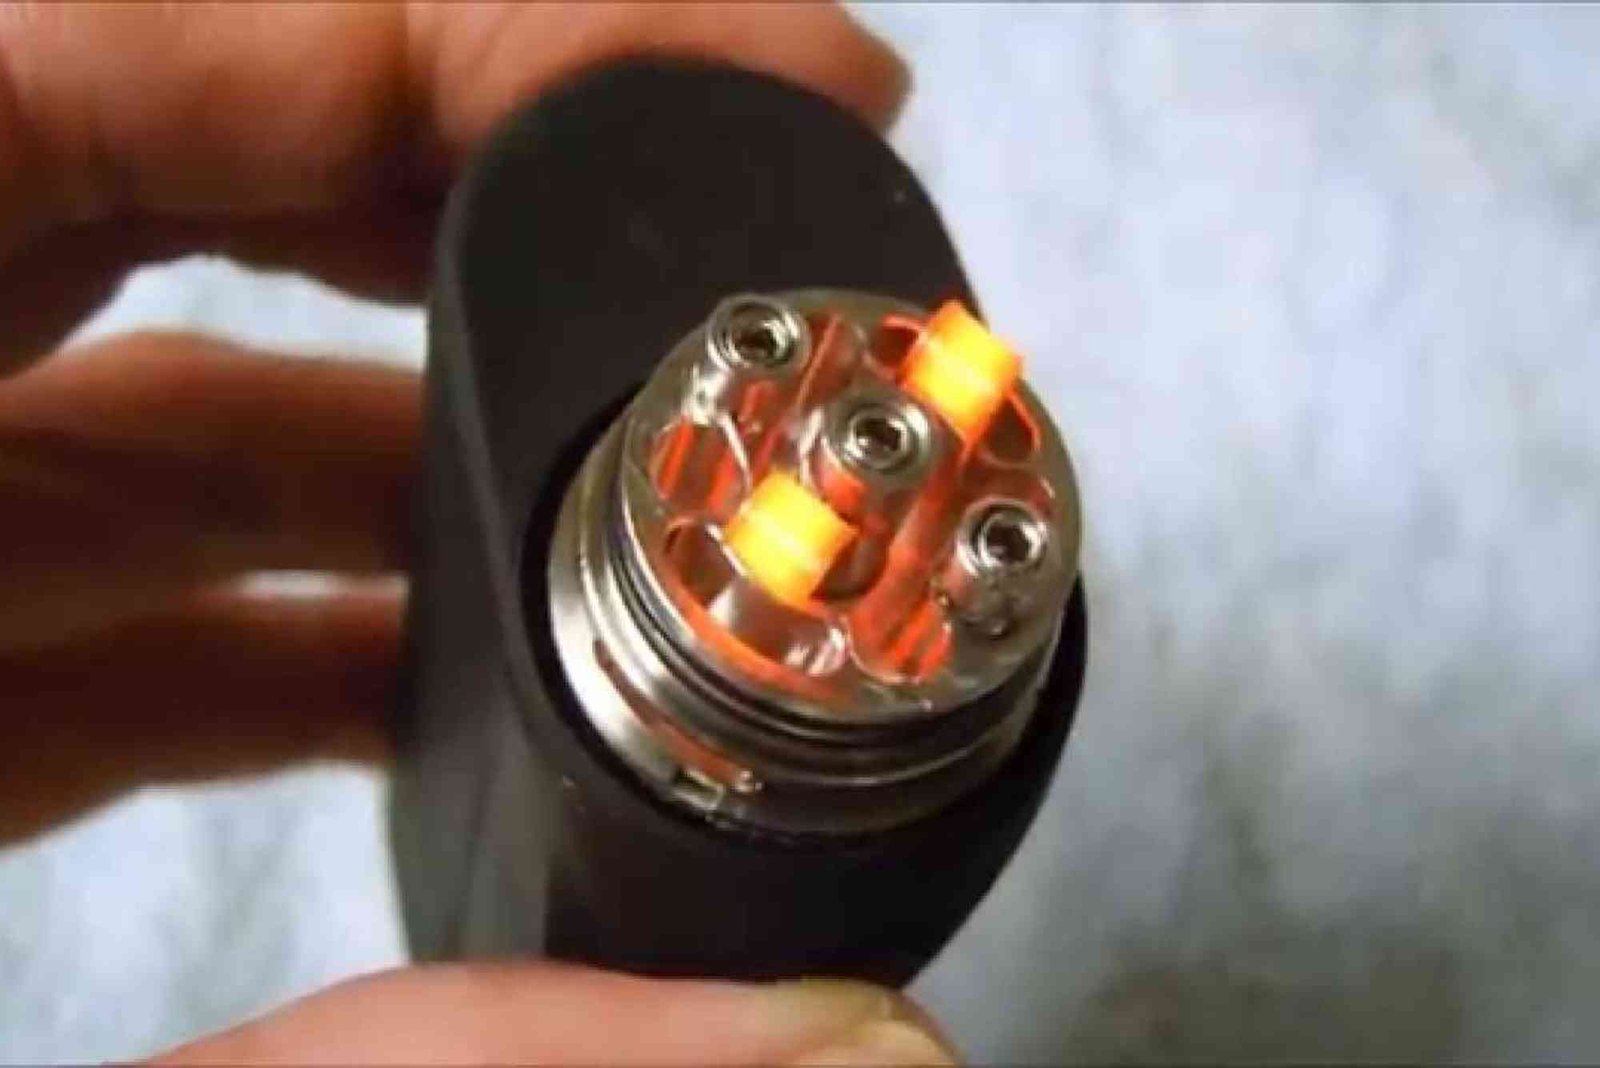
Pulse the Coil
After installing your coil into the atomizer, start with low wattage (15–20 watts). Fire the coil in short pulses. Watch the wire closely.
A healthy coil will glow evenly from the center outwards. If some sections glow brighter or faster, you’ve got hot spots.
Look for Flickering or Sparking
Tiny sparks or flickers can signal poor contact or oxidized areas. These need attention before you insert the wick.
Check for Discoloration
If parts of the coil change color prematurely, it’s another sign of uneven heating. Fixing coil hot spots at this stage is easier than after wicking.
Fixing Coil Hot Spots: Proven Techniques
Correcting hot spots doesn’t require special tools—just a bit of patience and attention to detail.
Adjust Coil Spacing
Gently tug the coil wraps apart with a ceramic tweezers or coil jig. Spaced coils naturally reduce hot spot formation because the wraps aren’t touching.
Strum the Coil
While firing at low wattage, lightly drag a ceramic tool across the coil from inside to out. This helps redistribute heat and remove micro shorts.
Squeeze and Re-Pulse
Pinch the coil with ceramic tweezers while pulsing. This tightens the wraps and allows the metal to realign its resistance. Be sure to let go before firing again.
Reposition the Coil
If you still notice hot spots, your coil might be touching the deck or posts. Use a screwdriver or rod to raise or center the coil within the atomizer chamber.
Rebuild if Necessary
Sometimes a bad wrap or damaged wire just won’t cooperate. If repeated attempts to fix the coil hot spots don’t work, it’s best to start fresh with a new build.
Common Mistakes That Cause Hot Spots
Avoid these frequent missteps to keep your coils performing optimally:
Over-tightening Screws
Cranking down too hard on the post screws can deform the wire, creating resistance pockets.
Using Dirty Tools
Contaminants on your tweezers or jigs can transfer to the coil, leading to oxidation.
Failing to Dry Burn Gently
Blasting your coil at high wattage too early can cause instant hot spots and metal fatigue.
Neglecting Wire Quality
Cheap or inconsistent wire is more prone to irregular resistance. Invest in trusted brands like Kanthal A1, Ni80, or SS316L for stable performance.
Tips to Prevent Coil Hot Spots in Future Builds
While fixing coil hot spots is doable, prevention is always better. Here’s how to build smarter:
- Use consistent, even tension when wrapping
- Space your wraps slightly if you’re a beginner
- Make sure coil legs are trimmed clean and seated well
- Dry burn at low wattages and increase gradually
- Use non-conductive ceramic tweezers for adjustments
These habits can dramatically reduce your chances of encountering hot spots in future builds.
Take Control of Your Vape Performance
Fixing coil hot spots isn’t just about better clouds—it’s about safety, consistency, and getting the most from your device. Once you learn to identify and fix them, you’ll enjoy cleaner flavor, longer coil life, and fewer frustrating moments.
Ready to upgrade your coil building game?
Start applying these tips today and experience smoother, more satisfying vape sessions.
FAQ: Fixing Coil Hot Spots
What causes hot spots in vape coils?
Hot spots usually result from uneven coil wraps, poor connections, or oxidized wire. Proper building technique helps avoid them.
How do I know if my coil has a hot spot?
During dry firing, if some parts of your coil glow brighter or faster than others, that’s a clear sign of a hot spot.
Can I fix hot spots without rebuilding the coil?
Yes, you can fix hot spots by strumming the coil, adjusting spacing, or repositioning it—no need to start over unless the damage is severe.
Why is my coil popping or sparking?
This can indicate a short circuit or oxidized areas. It’s best to stop firing immediately and inspect your build.
Are hot spots dangerous?
If left uncorrected, hot spots can burn your wick or cause shorts. Fixing coil hot spots early ensures safety and better performance.